Potting Configurations
There are a few different ways to put a houseplant in LECA and grow them in what we call “Semi-Hydroponics”. This guide will walk you through all the different configurations, and their pros and cons. Before we do, a little lesson on hydroponics.
In the world of hydroponics, there are numerous configurations and setups with pros and cons. The methods that have been adopted by semi-hydroponics growers are what’s known as passive hydroponics, meaning there is no active circulation of water using pumps and sprayers.
I tend to think of semi-hydroponics setups in two different categories. One uses a wick - usually a rope or a piece of microfiber cloth. The other doesn’t use a wick - it relies on the capillary action of LECA to draw up water from a reservoir that is in constant contact with the LECA.
Wicking Configuration - Nutrient Stagnant Wicking (NSW)
In a wicking configuration, a wick - typically a cotton string or a microfiber cloth is used to wick up the nutrient solution in the reservoir up to the LECA. In hydroponics terminology, this is known as the “Nutrient Stagnant Wicking” method, abbreviated as NSW. There are numerous scientific studies around growing in this configuration as well as the NFW method - Nutrient Flowing Wicking - which is essentially the same configuration but the plants share a reservoir that is pumped through the system. The TLDR here is that it’s been proven to work, and the nutrients along with water are wicked into the pot and further wicked to the plant by LECA.
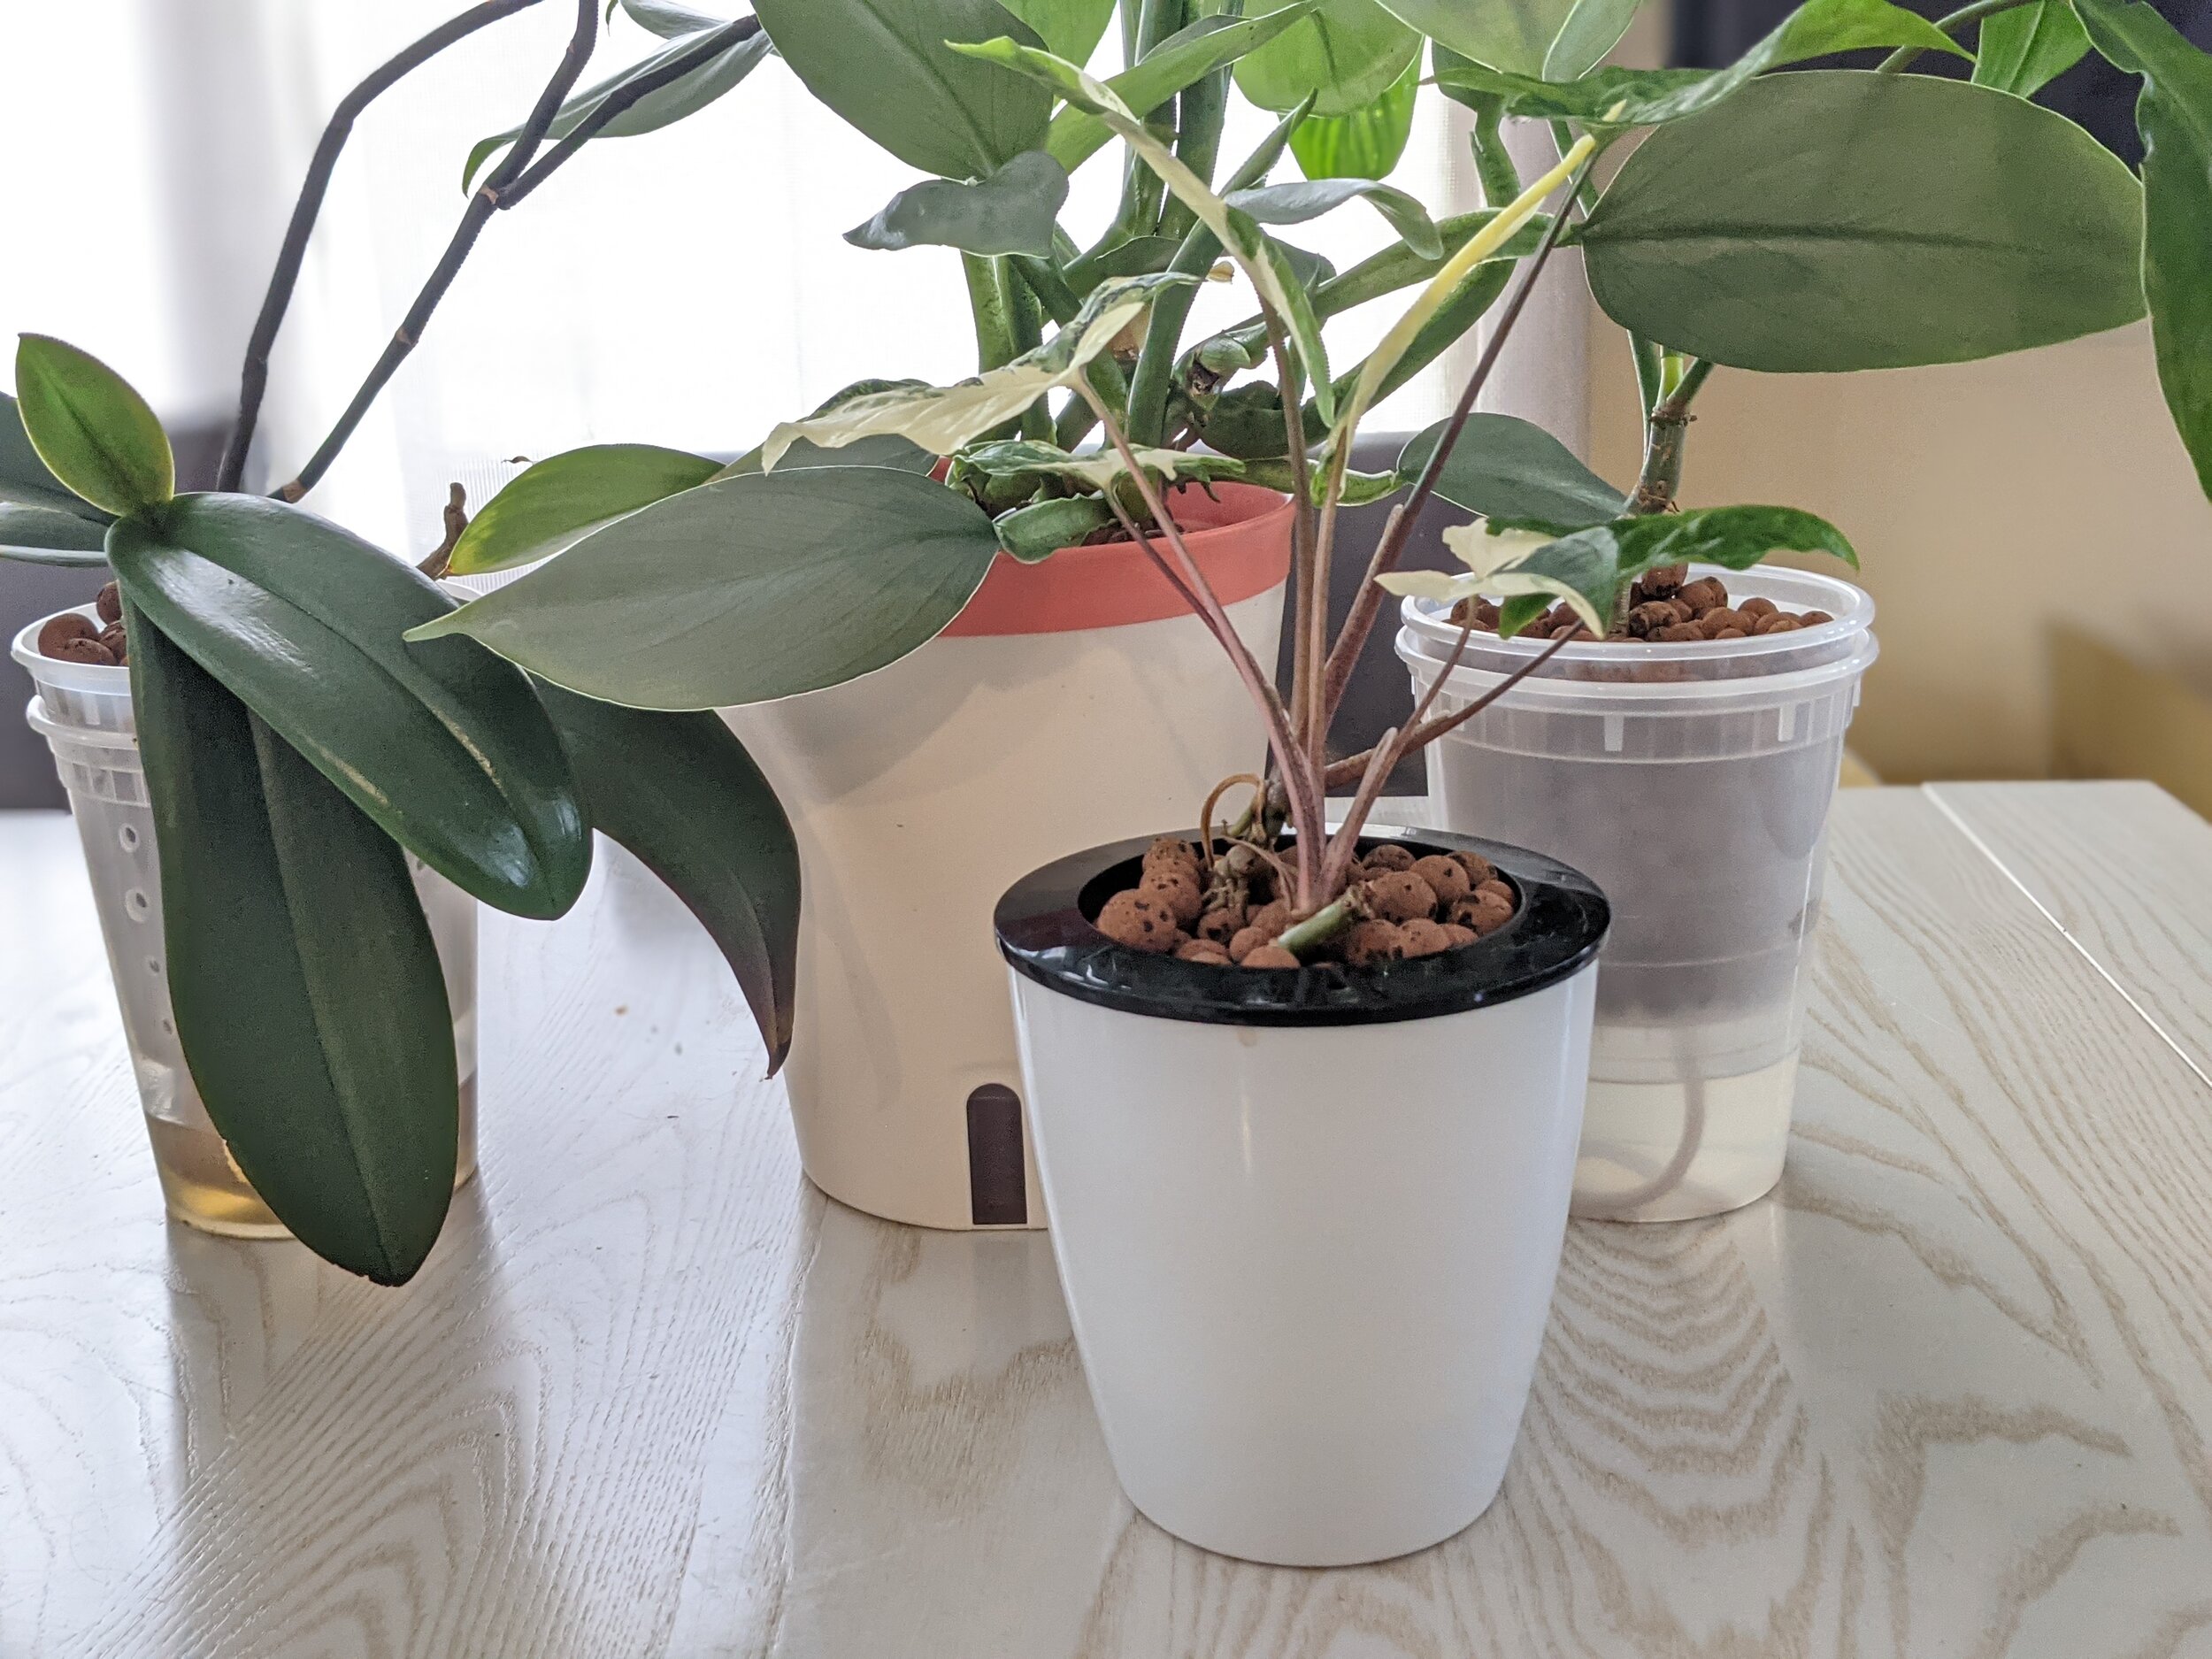
In the photo above, the orchid on the left is in two deli pots stacked on top of each other - a 24 oz deli pot and a 36 oz deli pot. Holes are added to the bottom of the pot using a soldering iron, and a wick made out of a microfiber cloth is pulled through. The LECA sits on top of the microfiber cloth. The philodendron on the right is using a similar setup but with a cotton wick.
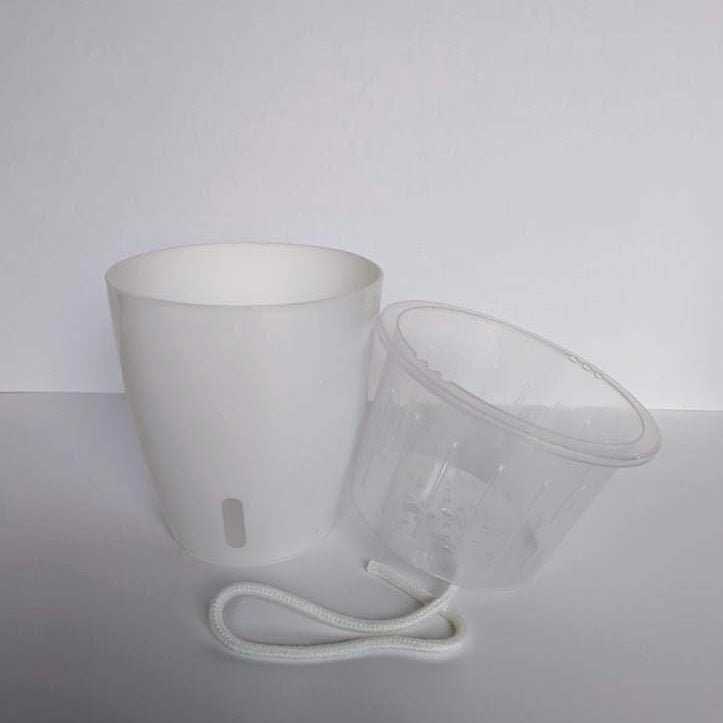
The white pot in the front is a part of the LECA Starter Kit, it uses a wick suspended in nutrient water, and the water is never in direct contact with LECA. The pot in the back is a deluxe version of the same method, it has a clear window into the water level which is super helpful in knowing when to water. This is one of my favorite pots commercially available right now.
2022 Edit - I geeked out so much on pot design that I worked with a manufacturing company to make my version of the perfect pot for Semi-Hydroponics! You can see in the following photo that it is a NSW setup with a clear inner pot that sits in an opaque outer pot with a water indicator window. You can purchase these here - they come in a 4.7” size and a 6.7” size.
Pros
You have better control over the overall wetness / dryness of the LECA by how you place the wick. For example, I can take the wick and coil it around inside the LECA for a wetter environment. I can put additional wicks into the system to further give it more water. I can also place the wick far above the water reservoir to make it drier.
You have a much larger reservoir. Most of the commercial self-watering pots can contain 1/2 cup of water or more. With the submerged configuration described below, LECA shares space with your nutrient solution so you can fit far less water into those reservoirs. In this configuration, the entire space can be occupied by the nutrient solution.
You have access to measure the nutrient water. Within this type of configuration, if you want to measure the pH or the EC / PPM of your nutrient solution, you lift up the inner pot and you have easy access to the nutrient water. In the submerged configuration, you cannot measure easily (but there are a few exceptions).
Most of the roots are contained in the inner pot, but some will grow out into the outer pot. They will hang between the two pots and that’s actually incredibly beneficial for added oxygenation to the root system.
Easy to flush water through, run water into the inner pot and let it drain out. Rinse out your reservoir container and refill.
Cons (I’m stretching a bit here, there really aren’t many cons to NSW systems)
Cotton wicks can degrade with time, so the recommendation here is to discard cotton wicks and use microfiber because it’s inorganic and will not degrade.
It can be a little more expensive to set these up because you’re buying self-watering pots, or using 2 deli containers instead of one.
Non-Wicking Configuration - Submerged
In a non-wicking configuration where the LECA is submerged in the nutrient solution, you are relying on LECA’s capillary action to draw water up from a reservoir. This is still a Nutrient Stagnant system, but the difference from the wicking configuration is that the nutrient reservoir is added to the LECA directly and there is no intermediary wick to draw the water up.
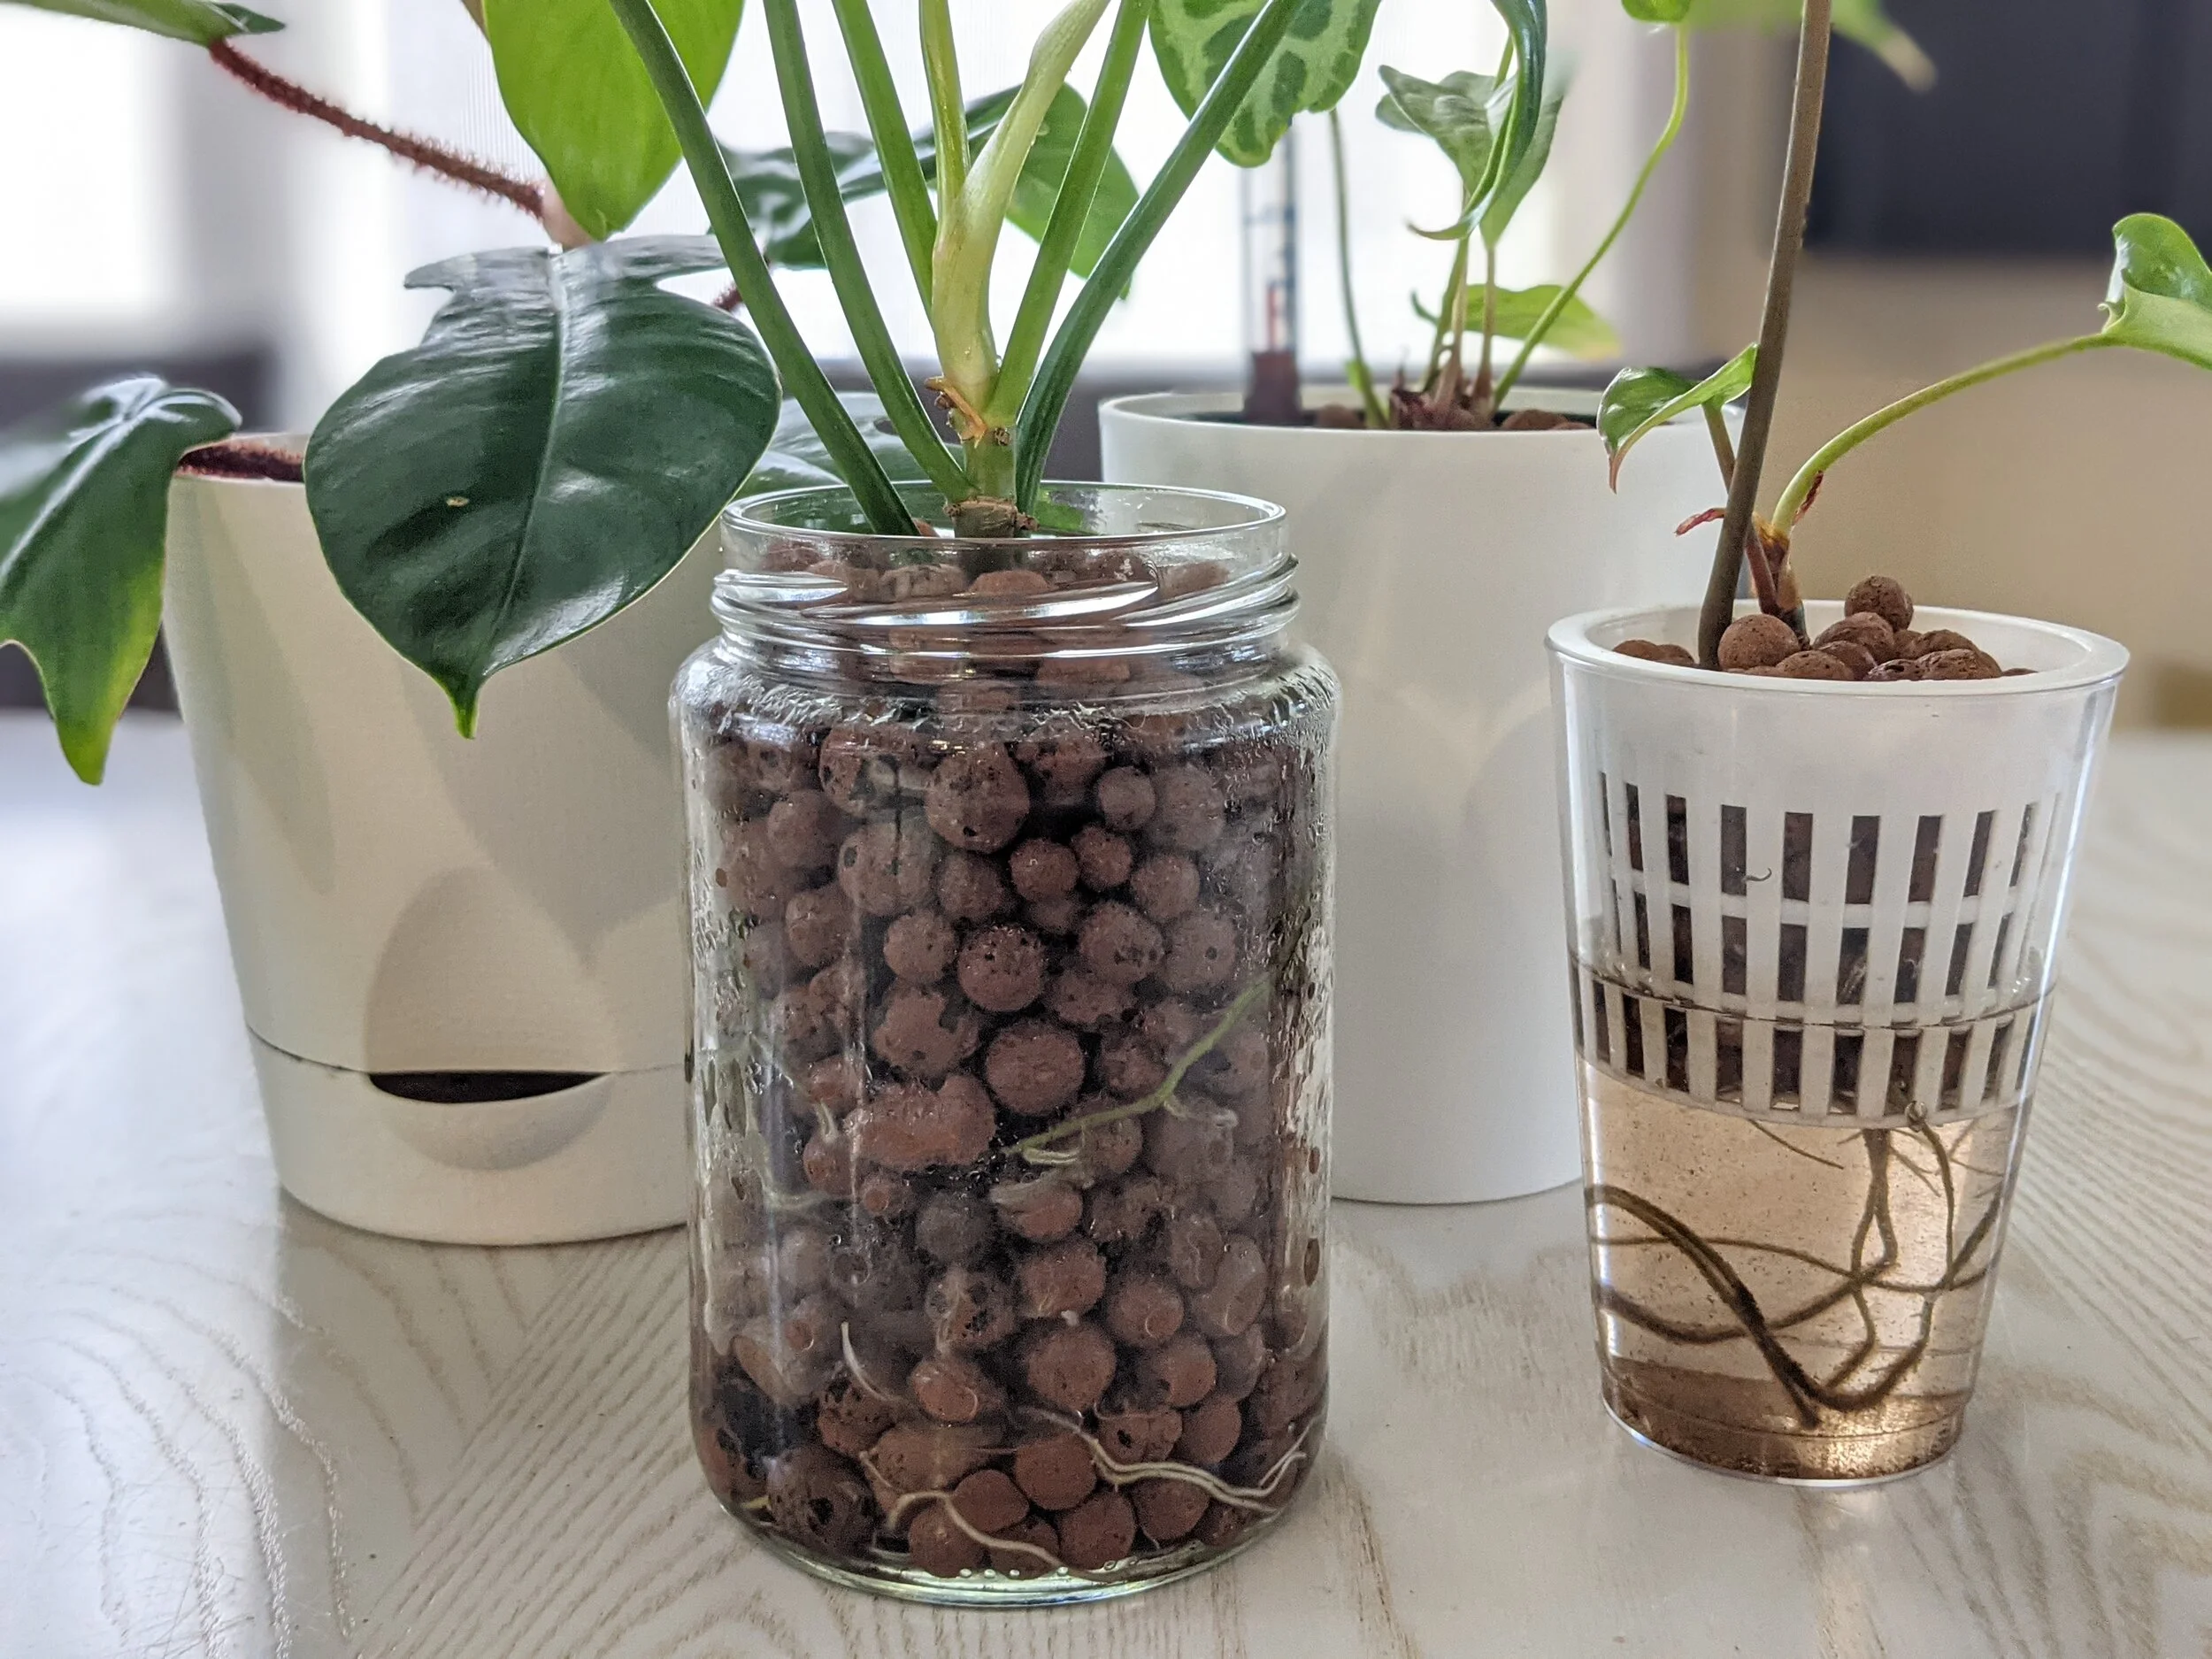
In the photo above, the glass pickle jar in the front is the most popular configuration amongst most semi-hydroponics growers. I’m not entirely sure why, other than it’s popular on YouTube, but I find this configuration to have a lot of setbacks that I will explain below in the pros / cons section. Sometimes people will drill a hole 1/3 of the way up from the bottom. I rarely have any glass pots that are drilled because I’m not a huge fan of this configuration. This is, however, my preferred method to transition a plant. It allows me to see the water level and root growth, both are important to keep an eye on when you move a plant from soil to LECA. A deli pot set up in this configuration is available in the LECA Starter Kit.

The white pot on the left is another interesting choice. This is a pot you can buy on Amazon and the bottom can be detached so you can flush the system really easily. It works via capillary action of the LECA - as you fill the pot with LECA, the ones in the bottom in the “X” is in contact with the water reservoir and wicks the water up to the plant roots. I have a few of these and I like them better than the glass jars because of the larger reservoir. There are bigger options available here.
The white pot in the back left is a fancy lechuza-style pot. It does not use wicks either, and the LECA you put in the inner pot is in contact with the reservoir so it works by wicking action. This pot has an even bigger reservoir, and a gauge to display water levels. You can purchase on Amazon in a few different sizes. I’m a big fan of this pot but it is definitely the more spendy option. In some cases I also add a wick to this pot.
Note: Amazon products constantly change. This pot doesn’t seem to be available anymore as of 2022, but I will keep my Amazon Ideas Lists updated to link some of the nicer pots coming onto the market.
The most interesting configuration is the net pot inside the plastic cup. You can skip this section if you don’t want to get a little nerdy, and just know that this setup is pretty cool as well. This configuration allows you to take the net cup out and measure the nutrient water to get a gauge of how much it’s “eating” and visually you can see how much it’s drinking - so it’s better than just the jar method. You can fill up the water to where I have it in the photo, and this is a submerged setup. You can also add a wick to the net pot and make a wicking-system. However the 3rd configuration here is lowering the water reservoir an inch from the bottom of the net pot, and suddenly you have the hydroponics growing method called Kratky. In the Kratky setup, the LECA is essentially used to keep the plant in-place, and only used for its capillary action when the plant is very young. The expectation is that the roots will elongate and grow into the water, and the reservoir is never reset back in contact with the LECA ever again. The roots that are in the water feeds from the reservoir, and that inch of roots in the air gets enough oxygen into the plant. I prefer the wicking and submerged methods described here for houseplants and orchids, and I don’t think we should be growing in the Kratky passive hydroponics setup the more that I learn about it. Kratky is designed for annuals / fruiting plants, and it’s expected that the plant is thrown away after a season. Within our semi-hydroponics method, we can actively create a beneficial bacterial culture inside LECA that’s much like soil to keep our plants healthy over multiple years. For the sake of this rundown I won’t go down that rabbit hole, just know that this configuration is valid, you can set the water level in contact with LECA, or in contact with the roots. With that said, I have my Monstera Thai Constellation in a Kratky setup, it’s in a large net pot, set inside a cache pot, and I never raise the water level to touch the LECA. It has roots that sits in the nutrient solution. Reason being - I found root rot after I repotted this setup using wicks and I really wanted the pot to dry out a bit. I water into the LECA, and every once in a while I will flush the entire pot so the LECA isn’t bone dry. This has worked pretty well over 1+ year, so perhaps the Kratky method works just fine!
Pros:
The most common setup for the submerged method uses glass jars, and keeping an eye on the roots and water level is what attracts a lot of people to growing in LECA. It looks neat, clean, and pretty.
100% confidence that your nutrient solution is going to the roots, and there are no “bottlenecks” in the system like the wicking ability of the wick, or the wick breaking down with time.
Cons:
In comparison to the wicking configuration, setups like the glass jar won’t allow you to easily access the nutrient water to measure PPM (unless you use one of the two self-watering pots I linked above). Most people will not care about this because it’s not feasible to test every single reservoir to understand the well-being of the plant. But for some of us nerds who want complete control over the plant and adjust on the fly (for high-value plants for example), it’s best not to use a glass jar.
In comparison to the wicking configuration, this method usually has a smaller reservoir. I have a monstera deliciosa in a 32oz deli pot and I have to water it every 3 days because it’s so thirsty and my reservoir is too small.
The roots will always grow down into the reservoir and collect there. There’s nothing wrong with having these water roots, but combined with the point above, now your reservoir has LECA and roots competing for space, so you’ll have to water more frequently. This also causes a lot of people to “move their plant up” which causes a lot of re-potting that further stresses a plant. If you’re doing this, stop! Here’s the reason why.
Long term, for certain plants like Hoyas, having a reservoir in this setup will eventually rot the roots after 6 months to 1 year. The alternative is to give these plants a wet-dry cycle to avoid root rot.
The labor of drilling holes into the glass jars adds up. Please be careful with drilling glass, you don’t want these dust particles in your eyes or inhaled in your lungs. The risk is not worth it for me personally.
The glass jars will never look good after 6 months to 1 year. Inevitably algae will enter your environment and grow a ring around the bottom of your pot.
Other Considerations
ALGAE ALGAE ALGAE. I’m always fighting algae in clear pots. The glass jar configuration is my least favorite because of the algae buildup over time. The stacking deli pot configuration, although a little more opaque, still grows algae. The clear plastic outer pots grow algae. The net pots set inside a large Tupperware container for an easier shared reservoir — grow algae. But if you use an opaque pot, you can’t visually see water levels - so it increases the mental burden of watering. Think back to your goals of growing in LECA and make a decision for a pot consideration that fits your lifestyle the best.
Using Both Configurations: I do use both. I use a clear container - whether a deli pot or a glass jar - to transition plants. I don’t use a double-deli setup because it’s a lot easier to set up one pot instead of two. For smaller cuttings I use a 2” tiny plastic drinking cup. But after a plant is established, I will inevitably transfer it to a wicking system using an opaque outer pot.
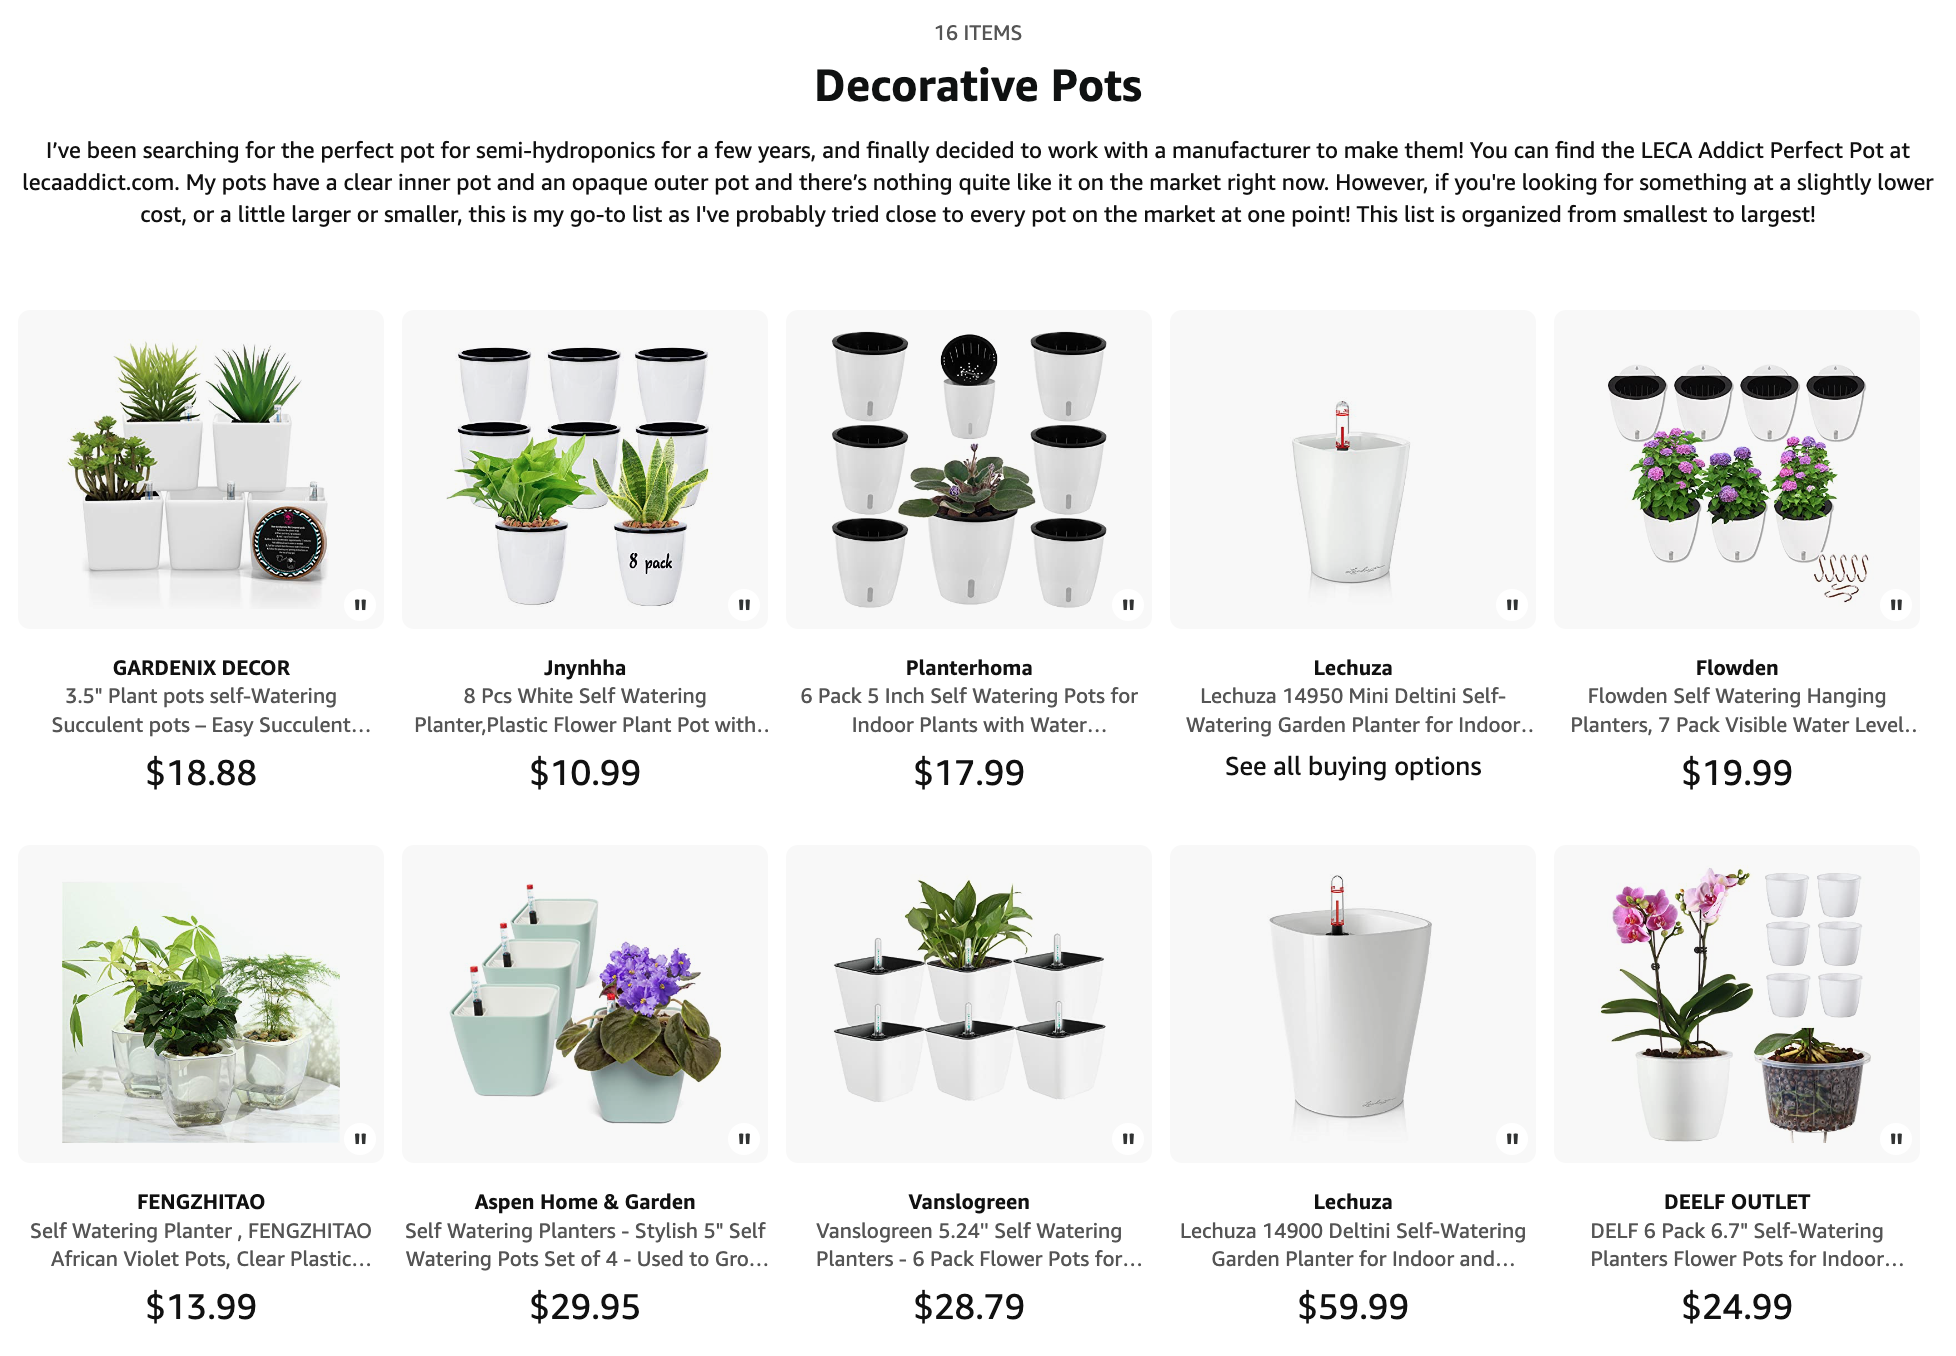
My Ideal Pot - A clear inner pot so I can see the root system, inside an opaque outer pot so it doesn’t grow algae. Add a little window at the bottom for the water level. I worked with a manufacturer in 2021 to make this pot a reality! You can buy these exclusively at PlantyQueens.
Products mentioned in this article
All of the products mentioned are compiled in this Amazon List for easy access. I do earn a commission for your purchase. Thank you for your support!